DIY {Washable & Reusable} Cotton Balls Tutorial!
Wednesday, June 24, 2020This post contains affiliate links. Purchasing through these links costs nothing extra and helps me continue to bring you all of the content you love.
I've been venturing out (in a mask. Please y'all, wear your masks!) to pick up groceries but that's about it. I've got plenty to keep me occupied here at the house so I've been doing all of the things I've been meaning to get to.
We painted our bedroom finally (which I'm still not finished with), moving furniture around, spring cleaning, learning to knit a sweater in a rib-knit (how do y'all knitters do this?! You wizards!), and sewing with the fabrics in my stash. I've still got a pile of repairs to get to in my sewing room but I keep thinking up fun projects like this, so they can wait. ;)

These DIY Cotton Balls are easy to make and will require a sewing machine and a little hand stitching to close them up (or you can hand stitch completely if that's your jam). These are stuffed with Poly-Fil but if you don't have any, you can also stuff them with coleslaw cut from fabric scraps.
Sidenote: I've also been watching a lot of YouTube. Mostly documentaries (did you know there were a ton of documentaries on YouTube?! Why didn't anyone tell me!!!) but I've also found some new sewing channels and one of my absolute favorites is Bernadette Banner. She sews historically accurate clothing and her videos are so beautiful and informative if you're into history. Did you know that Victorians (and others, I'm sure) called their fabric scraps "cabbage" and kept a basket of it. If you needed stuffing you would cut it up into "coleslaw". How cool!
Currently, my husband is the only one in the house who uses cotton balls. (I used to use cotton rounds. Check out this post for a DIY reusable version.) He puts on his aftershave with them, so he was excited to get a set of reusable cotton balls. I made them from a lightweight quilting cotton because I wanted them to be "soakable" but you can use whatever you have on hand that is 100% cotton and soft enough for use on the skin.
If you use these for makeup or nail polish remover, you can choose a white, bleachable fabric, or a black fabric that won't show stains as much.

So I geeked out and made something cool to go along with this tutorial. At first, I just made a little template that you could print out, cut out, and use. Then at 1 am last night, inspiration hit. (Why is it always 1 am?! *sigh* I like my sleep.)
I started thinking about templates that I've printed out from the internet and then I find them years later and can't remember how to put the project together. So, I wanted to also include the instructions on the template. But it's smol.
So, I came up with an instruction sheet you can print out, cut out the template from, and then transform into an envelope that will hold the template and it's also the perfect size to file with your other sewing patterns. I am so darn excited about this y'all!

You'll need to print this pdf sheet on sturdy cardstock at 100% (no resize).

Cut out the box on the top-right side and cut the template out from that box. Fold the bottom-right flap over to the back of the instructions and tape or glue in place.

If you don't have a printer you can make your own template: Draw a rectangle on a piece of cardstock or poster board that is 4" wide x 2-3/4" high. This includes 1/4" seam allowances. Mark your template on the right edge 7/8" from the top and then again 1-7/8" from the top. This is your opening for turning. All done!
Let's make some reusable Cotton Balls!!!
DIY Cotton Balls
Source: Southern Mom Loves
Supplies:
- 100% cotton fabric
- matching thread
- Poly-fil (or other stuffing material)
- template
- a pen or pencil for marking
- scissors
- straight pins
- hand-sewing needle
- thimble

Directions:
1. Use the template to mark your fabric. You can save time when making a big batch by marking all of the cotton balls you plan to make at one time in a grid on your fabric. We're going to call this "batching" here because you can do each step in a batch to save time.


2. Cut out all of your fabric rectangles and mark the turning opening on the wrong side of your fabric on each rectangle.

3. Fold the fabric right sides together at the short sides and pin if needed.

4. Using a straight stitch at about 2-2.5mm length on your machine, sew down the marked side with a 1/4” seam allowance (about the width of the basic sewing foot from the needle to the edge of the foot), stopping and backstitching at the first opening mark. Lift the foot and slide the fabric forward to the second mark, backstitch, and continue sewing the seam.

This will leave you with a line of stitching with a 1" opening. You can batch this step.

5. You will now have a fabric tube. Place the seam in the center of one side and finger press the edges. Fold the left and right edges into the tube to the center seam and press flat with your fingers. Pin in place at the top and repeat with the bottom of the tube.
You will now have a pleat into the left and right side with a flat front and back. (Kind of like a Barbie-sized old-timey vacuum cleaner bag.) Stitch each end closed.

You can also batch this step. :)

6. Using the 1” opening, turn your fabric inside-out so that the right side of the fabric is outside.

7. Stuff your fabric nugget with Poly-fil to your preference of firmness. Pin the opening closed.

8. Gather all of the stabby marshmallows and your hand-sewing supplies and go and watch something on TV or YouTube. Seriously. Have fun.

During commercials/ads/boring parts, sew these closed by hand using a ladder stitch if you're feeling fancy or a basic whip stitch if you're not. It's your project, your rules.

A ladder stitch is basically taking a little bite with your needle out of the left edge, then the right edge in a ladder formation. When you pull it tight, you can't see the stitching!
 |
| Tilted so you can see the stitching 😂 This was a "quick" ladder stitch that is more like a running stitch where you weave left and right. It's so fast to do! Highly recommend. |

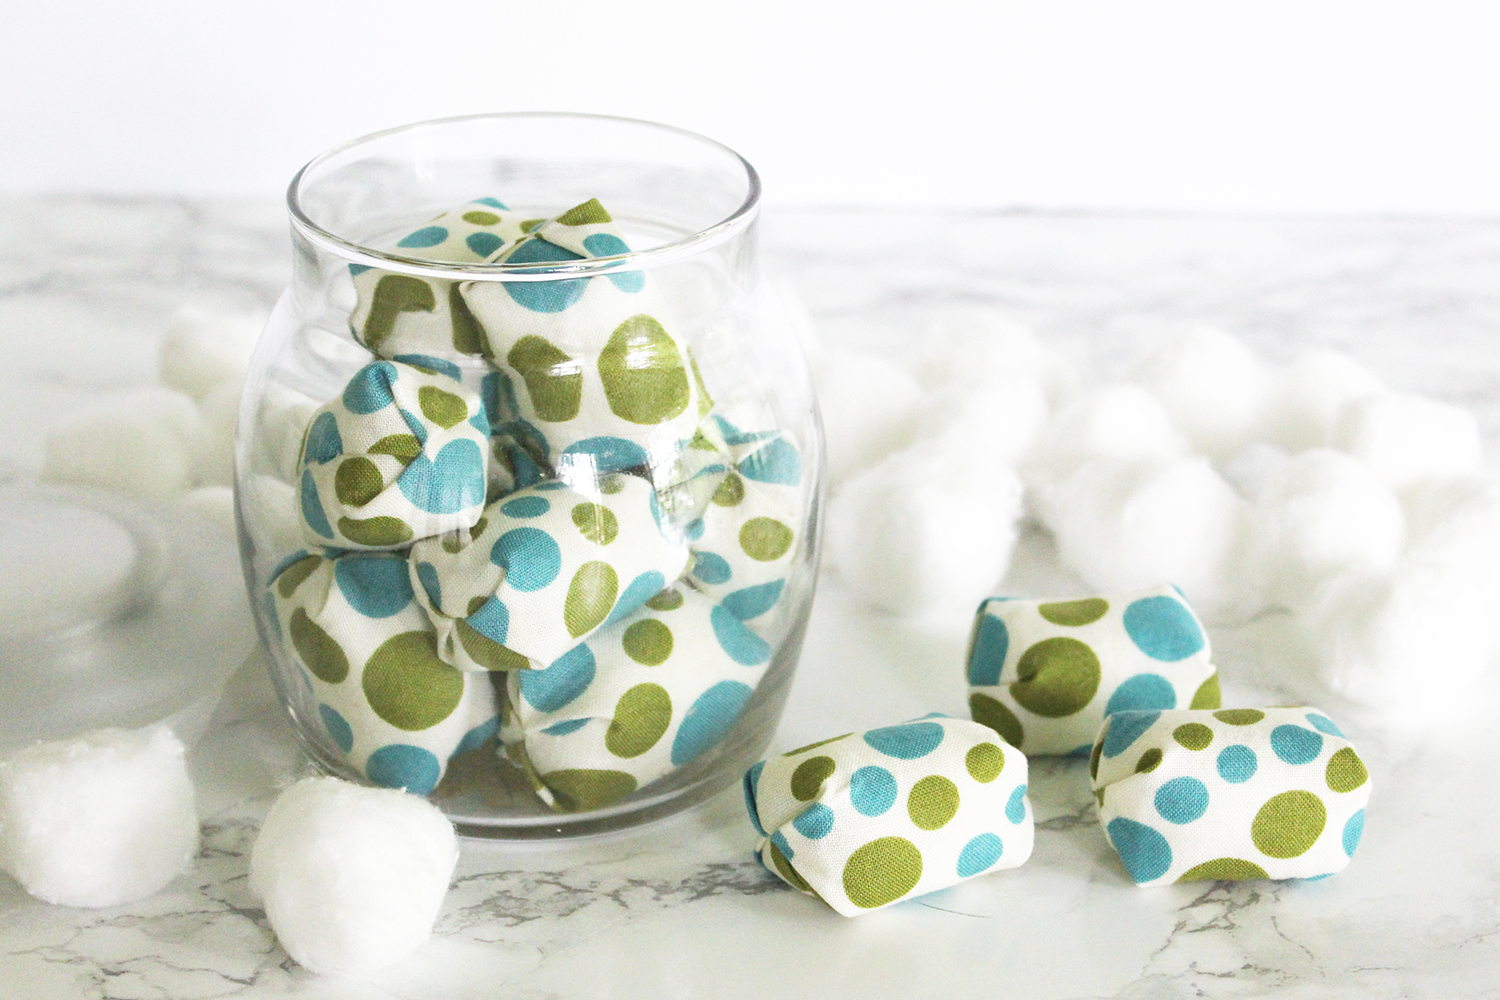
There you have it! DIY Cotton Balls!!!

Like this post? Pin it!

Will you be making DIY Cotton Balls? What other DIYs would you like to see? I love to read your comments1


0 comments